Biyernes, Oktubre 7, 2016

Lesson 13

Teaching with Visual Symbols

   Visual symbols include drawings, cartoons, strip drawings, diagrams, formulas, charts, graphs, maps, globes. Let us divide this lesson into seven (7) parts:
A.   DRAWINGS

A drawing may not be the real thing but better to have a concrete visual aid than nothing. To avoid confusion, it is good that our drawing correctly represents the real thing.
Here are some samples of stick drawings:
B.   CARTOONS

Another useful visual symbol that can bring novelty to our teaching is the cartoon. A first-rate cartoon tells it¢s story metaphorically. The perfect cartoon needs no caption. The less the artist depends on words, the more effective the symbolism. The symbolism conveys the message.
Here are examples:
C.   STRIP DRAWINGS

These are commonly called comics or comic strip. Dale (1969) asserts that a more accurate term is strip drawings. Make use of strips that are educational and entertaining at the same time.
Here is an example:
D.   DIAGRAMS
It is “any line drawing that shows arrangement and relations as of parts to the whole, relative values, origins and development, chronological fluctuations, distribution, etc. ” (Dale 1969)
Here is an example:
Types of a Diagram
1.    Affinity diagram- used to cluster complex apparently unrelated date into natural and meaningful groups.

2.    Tree diagram- used to chart out, in increasing detail, the various tasks that must be accomplished to complete a project or achieve a specific objective.

3.    Fishbone diagram- it is also called cause-and-effect diagram. It is a structured form of brainstorming that graphically shows the relationship of possible causes and sub causes directly related to an identified effect/problem. It is most commonly used to analyze work-related problems.

E.   CHARTS  
A chart is a diagrammatic representation of relationships among individuals within an organization. We can have a:
1.    Time chart-is a tabular time chart that presents date in ordinal sequence. Here is an example:

2.    Tree or stream chart- depicts development, growth and change by beginning with a single course (the trunk) which spreads out into many branches or by beginning with the many tributaries which then converge into a single channel. The genealogical tree is an example:

3.    Flow chart-is a visual way of charting or showing a process from beginning to end. It is a means of analyzing a process. By outlining every step in a process, you can begin to find inefficiencies or problems.(Latta,1994)

4.    Organizational chart- shows how one part of the organization relates to other parts of the organization.

5.    Comparison and contrast chart- used to show similarities and differences between two things.

6.    Pareto chart- is a type of bar chart, prioritized in descending order of magnitude or importance from left to right. It shows at a glance which factors are occurring most.


7.    Gannt chart- is an activity time chart.

F.    GRAPHS  
There are several types of graphs. They are:
·         Pie or circle graph- recommended for showing parts of whole.

·         Bar graph- used in comparing the magnitude of similar items at different ties or seeing relative sizes of the parts of a whole.

·         Pictorial graph- makes use of picture symbols.

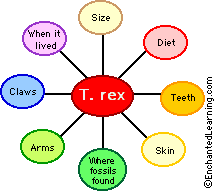
·         Graphic organizers- you met several graphic organizers in your subject, Principles of Teaching. Here is another graphic organizer, an information organizer.
G.   MAPS 
A map is a “representation of the surface of the earth or some part of it…”  (Dale 1969)
Kinds of Map
·         Physical map- combines in a single projection data like altitude, temperature, rainfall, precipitation, vegetation and soil.

·         Relief map- has three dimensional representations and show contours of the physical data of the earth or part of the earth.

·         Commercial or economic map- also called product or industrial map since they show land areas in relation to the economy.

·         Political map- gives detailed information about country, provinces, cities and towns, roads and highways. Oceans, rivers and lakes are the main features of most political maps.

Map Language
Ø  Scale- shows how much of the actual earth¢s surface is represented by a given measurement on a map. On some maps, scale is shown graphically. In others the scale is expressed in words and figures.
Ø  Symbols- usually a map has a legend that explains what each symbols means.
Ø  Color- the different colors of the map are part of the map language.
Ø  Geographic graphs- the entire system of these grid lines are called grid lines. These grid lines called meridians and parallels. A meridian is a north to south pole line. Parallels are lines drawn around a globe with all points along each line with an equal distance from the pole. Longitude is the distance in degrees of any place east or west of the prime meridian. Latitude is the distance in degrees of any place north and south of the equator.

Poster-An artistic work, often a reproduction of an original painting or photograph, printed on a large sheet of paper.


Lesson 12

The Power of Film, Video and TV in the Classroom

The appeal of visual media continues to make film, video and television as educational tools with high potential impact. They are now more accessible and less cumbersome to use. Let us take advantage of them in the classroom.
            The film, the video and the tv are indeed very powerful. Dale(1969)says, they can:
·         Transmit a wide range of audio-visual materials, including still pictures, film, objects, specimens and drama.
·         Bring models excellence to the viewer.
·         Bring the world of reality to the home and to the classroom through “live” broadcast or as mediated through film or videotape.
·         Make us see and hear for ourselves world events as they happen.
·         Be the most believable news source.
·         Make some programs understandable an appealing to a wide variety of age and educational levels.
·         Become a great equalizer of educational opportunity because programs can be presented over national and regional networks.
·         Provide us with sounds and sights not easily available even to the viewer of a real event through long shots, close ups, zoom shots, magnification and split screen made possible by the tv camera.
·         Can give opportunity to teachers to view themselves while they teach for purposes of self-improvement.
·         Can be both instructive and enjoyable.
   While the film, video and tv can do so much, they have their own limitations too.
·         Televisions and film are one-way communication device.
·         The small screen size puts television at a disadvantage when compared with the possible size of projected motion pictures.
·         Excessive tv viewing works against the development of the child¢s ability to visualize and to be creative and imaginative, skills that are needed in problem solving.
·         There is much violence in tv. This is the irrefutable conclusion, “viewing violence increases violence”.
   Basic Procedures in the Use of TV as a Supplementary Enrichment 
            For enrichment if the lesson with the use of tv, we have to do the following:
·         Prepare the classroom.
~        Darken the room. Remember that complete darkness not advisable for tv viewing. Your students may need to take down notes while viewing.
~        The students should not be seated too near nor too far from the tv.
·         Pre-viewing Activities
~        Set goals and expectations.
~        Link the tv lesson and with your student¢s experiences for integration and relevance.
~        Set the rules while viewing.
~        Put the film in context.
~        Point out the key points they need to focus on.
·         Viewing
~        Don’t interrupt viewing by inserting cautions and announcements you forgot to give during the previewing stage.
~        Just make sure sights and sounds are clear.
·         Post-viewing
~        To make them feel at ease begin by asking the following questions:
1.    What do you like the best in the film?
2.    What part of the film makes you wonder? doubt?
3.    Does the film remind you of something or someone?
4.    What questions are you asking about the film?

   The film, video and tv are powerful instructional tools. When they are used appropriately and moderately, they can make the teaching-learning process more concrete, lively, colorful and interactive. It contributes to a more lasting learning because it¢s visual, audio and motion effects. These effects make learning fun. However, misuse and abuse of their use in the classroom and even at home has far reaching damaging effects in the development of the children¢s imaginative and thinking powers and sensitivity to human life. The most significantly cited weakness of the tv is the effect of tv violence on people¢s aggressive behavior.

Lesson 11

Making the Most of Community Resources and Field Trips

   The teacher’s comments given above indicate failure of the field trips conducted. This is definitely the consequences of no planning or if ever there was, planning was done poorly.
   What procedures must we follow to avoid the failed study trips described above? Let’s plan. Planning a field trip includes these steps:
1.    Preliminary planning by the teacher.
2.    Pre-planning with others going on the trip, and
3.    Taking the field trip itself and,
4.    Post-field trip follow up activities.
   For preliminary planning by the teacher, Brown (1969) proposes the following:
·         Make preliminary contacts, a tour on final arrangements with the place to be visited.
·         Make final arrangements with the school principal about the details of the trip: time, schedule, transportation arrangements, finances and permission slips from parents.
·         Make a tentative route plan, subject to later alteration based on class planning and objectives.
·         Try to work out mutually satisfactory arrangements with other teachers if the trip will conflict with their classes.
·         Prepare preliminary lists of questions or other materials which will be helpful in planning with the students.   
   Pre-planning with students joining the trip:
·         Discuss the objectives of the trip and write them down. The main objectives should be included in the permit slip given to parents and should be consulted later when the trip is evaluated. Here is a sample of Permit Slip.
·         Prepare a list of questions to send ahead to the guide of the study trip.
·         Define safety and behavior standards for the journey there and for the field trip site itself.
·         Discuss and decide on ways to document the trip. Everyone is expected to take notes.
·         List specific objects to be seen on their way to the site, on the site of the field trip and on their way home from the site.
·         Discuss appropriate dress. Comfortable shoes for walking are important.
·         Before the trip, use a variety of learning materials in order to give each student a background for the trip.

_______________________________________
( Name of School )
PARENT’S APPROVAL and WAIVER

To the Principal of _________________________________________________________ School
                                          (Name of School)
________________________________________________ has my permission to attend the Field Trip           (Name of child/ward)
to/at__________________________________________on Date____________________________
Time_______________________ Under the supervision of __________________________________

I further agree to assume the responsibility of seeing that my child cooperates and conforms to the fullest with the school directions and instructions of the school officials in charges and I hereby free the school authorities from any responsibility for any untoward incident arising from this trip thereby waiving my future claim for damages against the school, provided, however, that the damage or injury incurred is not directly attributable to the negligence of the school authorities themselves.
Signed ______________________________
                                                              (Parent/ Guardian)
________________________________________
                                                            (Address)
________________________________________
                                                             (Telephone/Mobile Phone No.)

Taking the Field Trips
·         Distribute route map of places to be observed.
·         Upon arriving at the destination, teacher should check the group and introduce the guide.
·         Special effort should be made to ensure that:
~        The trip keeps to the time schedule.
~        The stunts have the opportunity to obtain answers to questions.
~        The group participates courteously in the entire trip.
~        The guide sticks closely to the list of question.
   Evaluating Field Trip
            These are questions we can ask ourselves after the field trip to evaluate the field trip we just had.
·         Could the same benefits be achieved by other materials? Was it worth the time, effort and perhaps extra money?
·         Were there any unexpected problems which could be foreseen another time?
·         Were new interests developed?
·         Should the trip be recommended to other classes studying similar topics?
Educational Benefits Derived from a Field Trip
            Field trips can be fun and educational when they are well executed. They offer us a number of educational benefits:
1. Field trips are opportunities for rich and memorable experiences which are fundamental to learning that lasts.
2.    Field trips bring us to the world beyond the classroom.
3.    Filed trips have a wide range of application.
4.   It can bring about of realizations which may lead to changes in attitudes and insights.
Disadvantages of Field Trips
            These educational benefits can compensate for the drawbacks of field trips, some of which are:
1.    It is costly.
2.    It involves logistics.
3.    It is extravagant with time.
4.    Contains an element of uncertainty.